
Spring 2015 - Ball of Wax, BFA Exhibition, Visual Arts Center, Boise State University, Boise, ID
These images take you through my experimentation and process to create two large kiln-formed and borosilicate glass wall sculptures.
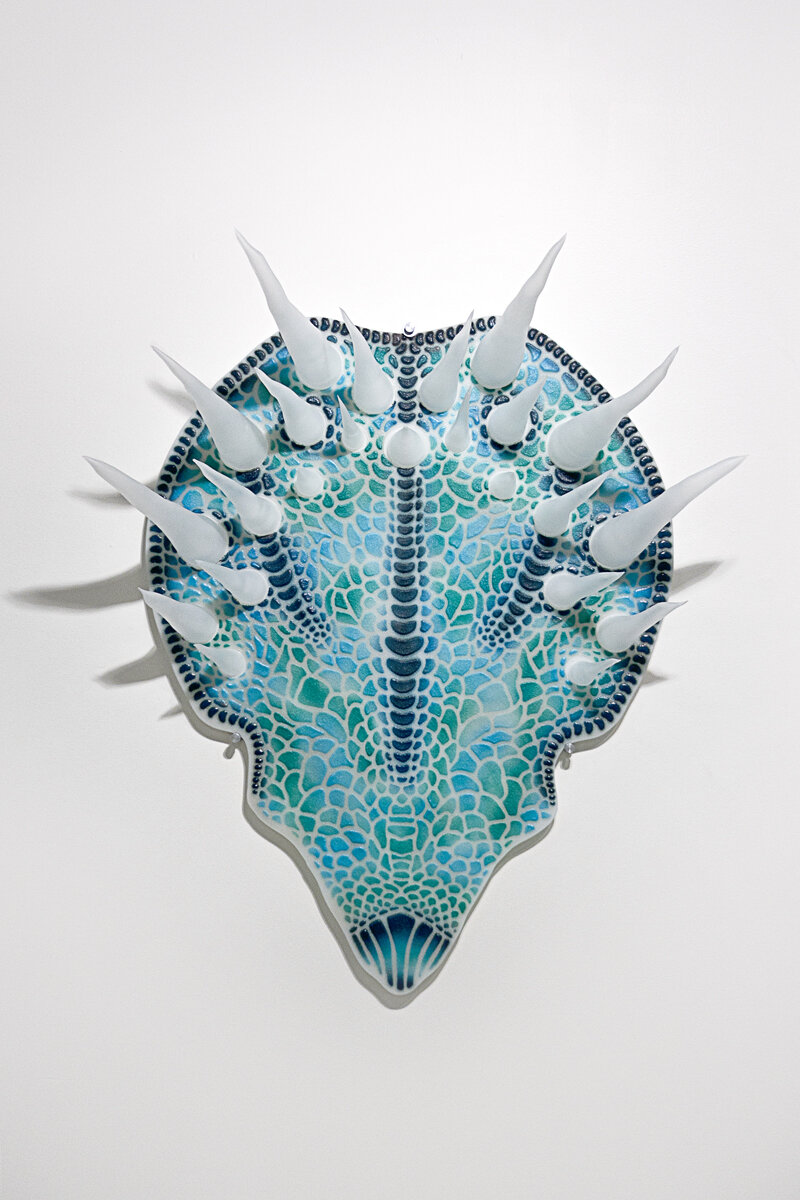
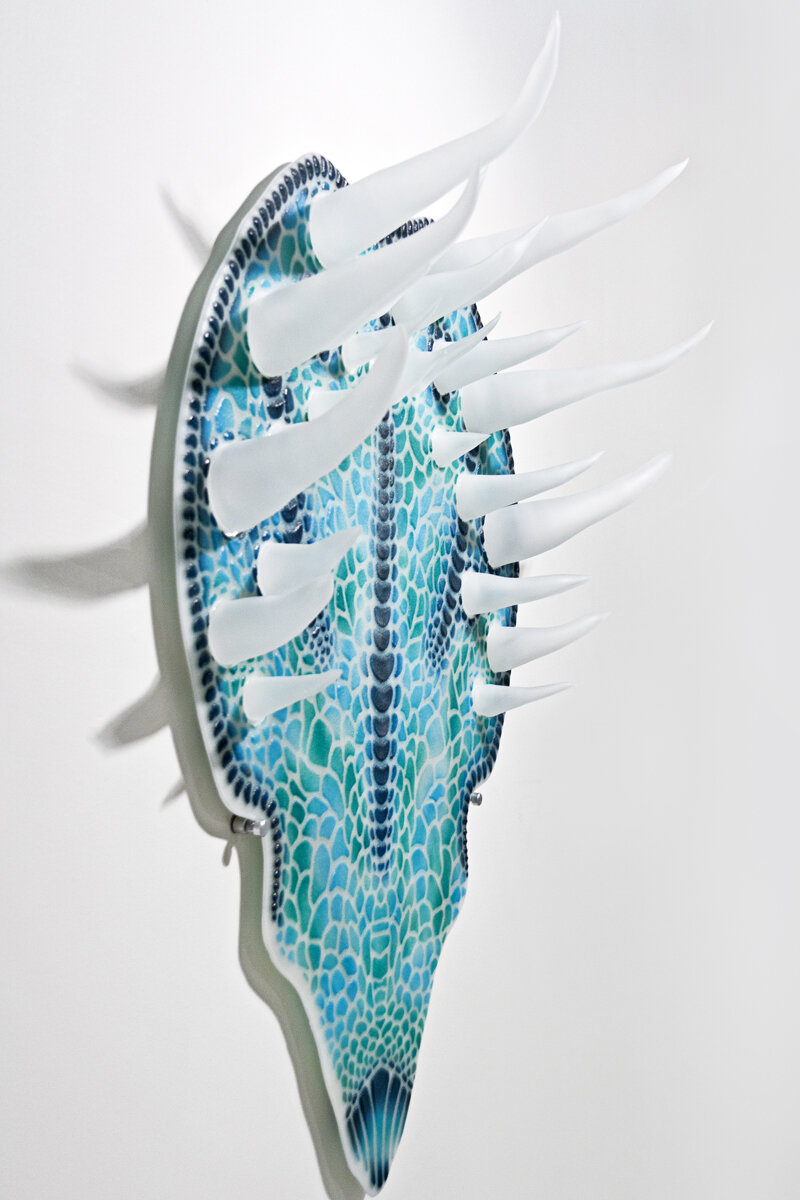
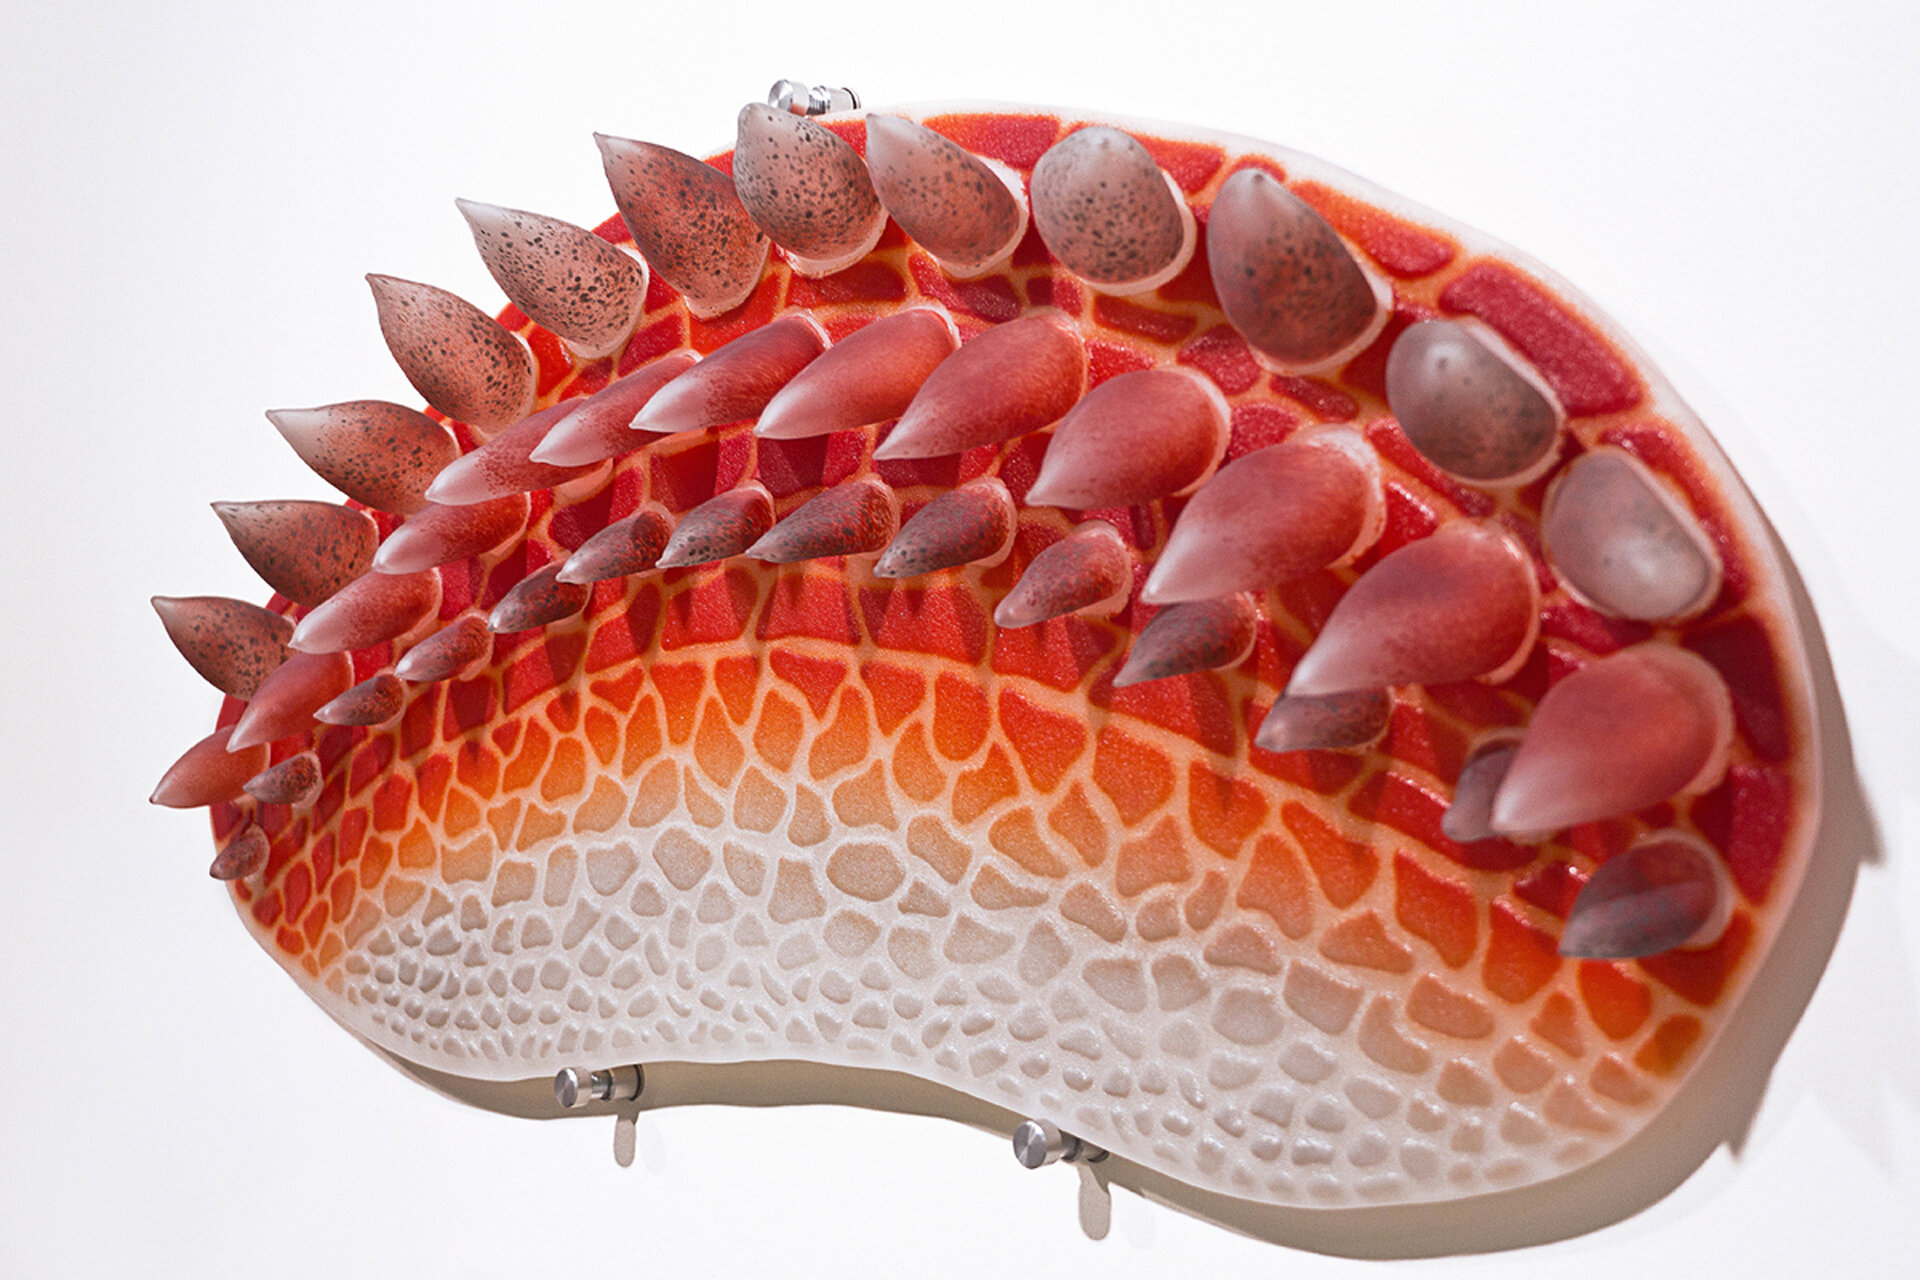
Blue: Topsian Frill, Kiln formed and Flamework Glass, 40” x 49” x 13”
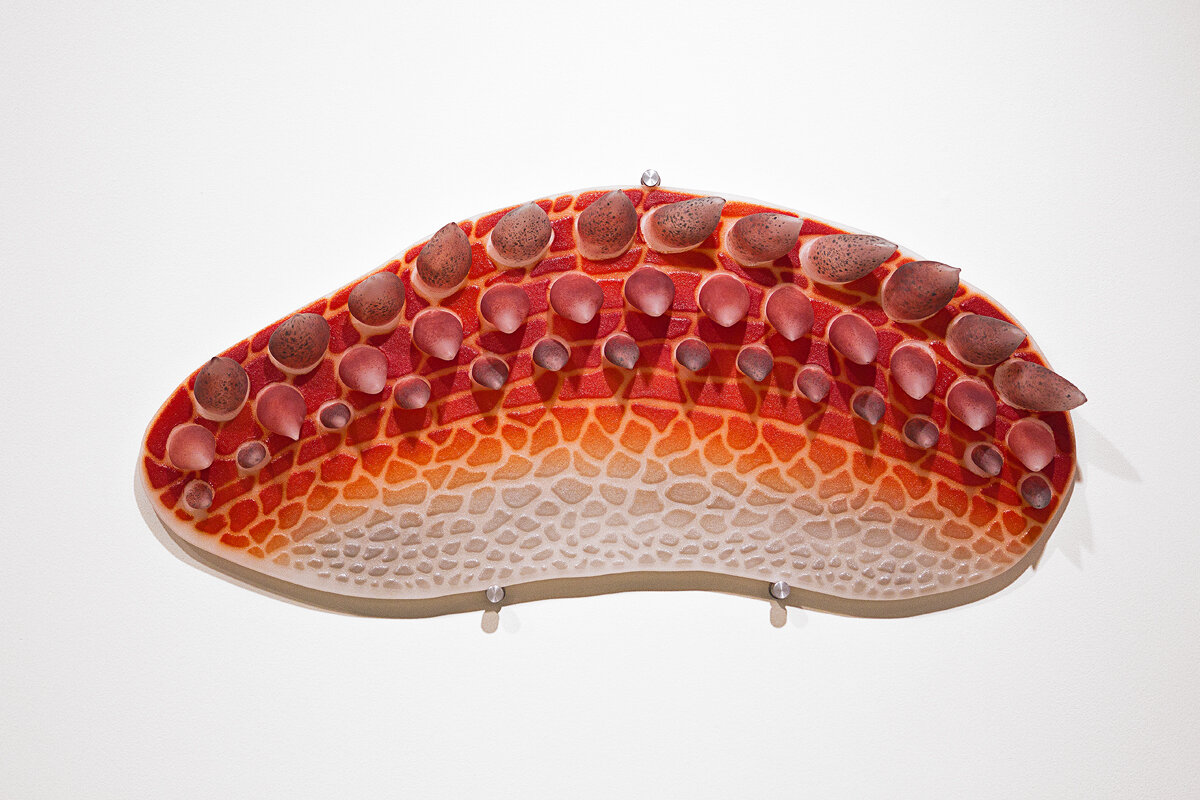
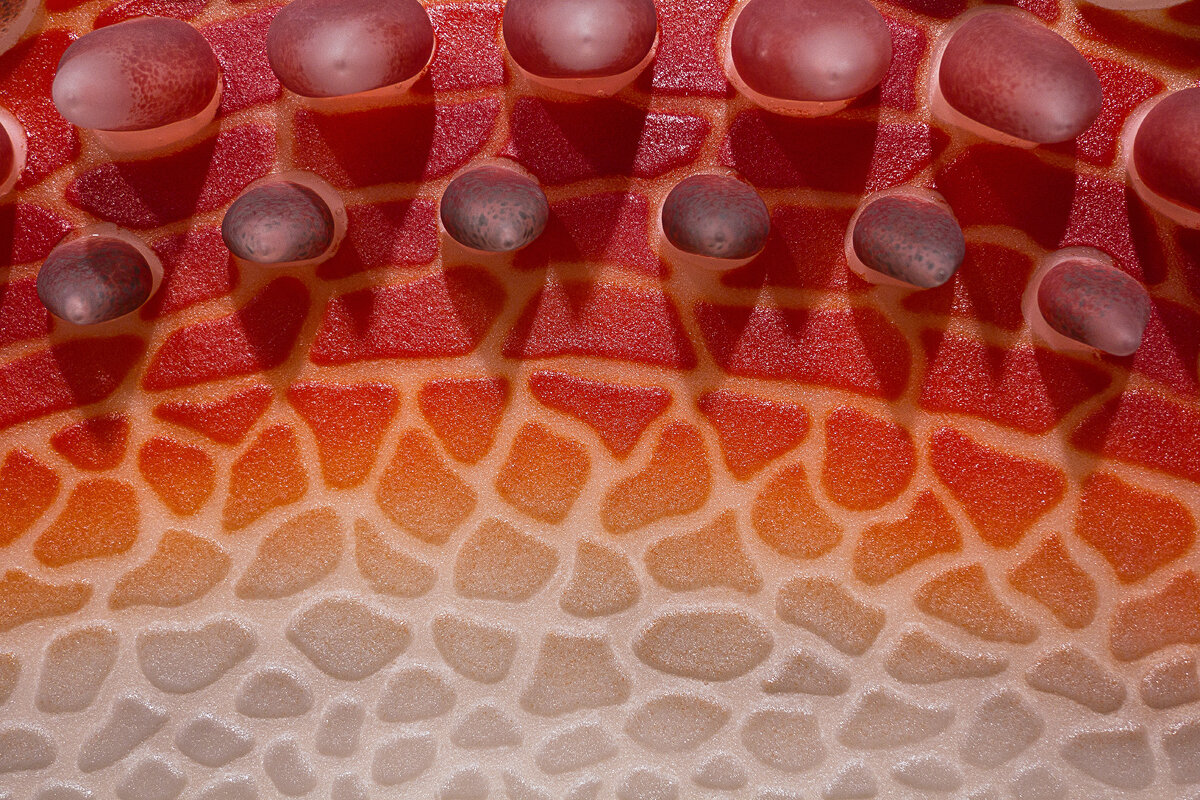
Red: Saurid Armor, Kiln formed and Flamework Glass, 32” x 14” x 6”
Artist Statement:
Dinosaurs are extraordinary reptiles that began their rule on earth over 200 million years ago. Even though they roamed the globe for a span of 150 million years, their mass extinction occurred in the blink of an eye. Scientists discovered the first dinosaur fossils in the early 1800s. Since then, over 700 different species have been discovered, and paleontologists believe many more species will be found.
My seven-year-old son Kashus has been fascinated with dinosaurs since he was old enough to talk. As he grew, so did his love of these giant prehistoric creatures. My interests in geology and paleontology would only encourage his curiosity. The passion we share continues to inspire both of our imaginations.
Paleontologists utilize fossilized remains to interpret the size and shape of dinosaurs, but how they look and feel in real life is a puzzle that scientists have yet to solve. I envision these colossal creatures painted in numerous bright colors with scales, tails, feathers, enormous teeth, spikes, horns, and claws. While exploring their physical features, I memorialize these beasts in vivid colors with representational markings and form. I intend to leave the viewer with a new sense of curiosity influenced by the childlike imagination we all once had.
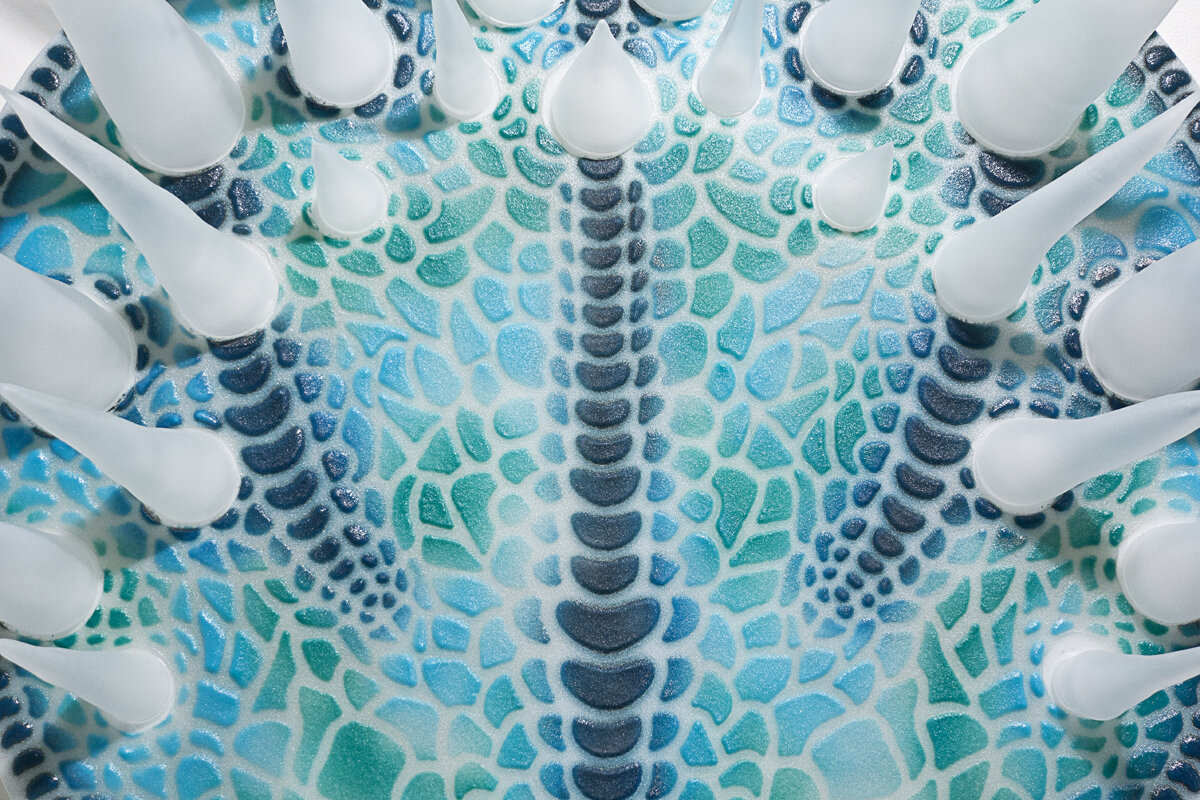
As a glass artist with an educational background in printmaking, I utilized techniques of each medium to translate my deconstruction of the prehistoric creatures Styracosaurus and Ankylosaurus. Each exhibits 3-dimensional qualities of blown glass while combining full fused glass panels with tack fused, course shapes created through a stencil process. When employing the stencil, I layered several colors of sifted glass powder just as I would pull layers of ink through a stenciled screen to create a print. Intertwining these processes allows for a new experience with a medium and pushes the boundaries of what defines or divides one process from another.


My first test firing looking for the right amount of texture and technique of fading colors.


Test firing for final colors

Test firing for final colors

Test firing, looking for hot spots, but hoping for even heat and consistency of texture from previous firings conducted in a different kiln.

Staging the bed of the kiln with shelves. After this the kiln shelves were then covered in sand and spread evenly creating a completely level surface. I then fired the kiln again to burn out any impurities in the sand.

After hand-blowing all of the spikes, cutting, and grinding them flat I can now plan and design the remainder of the piece.

After hand-blowing all of the horns, cutting, and grinding them flat I can now plan and design the remainder of the piece.

White sheets and clear sheets of glass are hand cut in preparation to be fully fused together.

The sand covered kiln shelves then have layer of kiln paper to protect the glass from fusing to the sand.

The stencil is then placed slightly above the white full fused glass piece and color powdered frit is sifted through.

Before firing…


Final drawing used to create the vector file.

The vector file is then used to assist a CNC router to cut out my stencil from Masonite.

Final drawing used to create the vector file.

Full fuse of white and clear class is complete. I will now block out the areas where the spikes or horns will be attached later.


Color is now fully sifted onto the main pieces and the covered areas are now exposed. This process took several hours.

…after firing

The curing time for this glue was sped up by placing everything back into the kiln and holding the temperature at 100 degrees Fahrenheit for 24 hours.

The vector file is then used to assist a CNC router to cut out my stencil from Masonite.

Applying initial base layer of powdered glass. Paper is placed around all edges to prevent excess glass from melting on to the kiln paper when fired.


The bottom of the kiln was carefully rolled back under the top and set for it’s final firing.


After the final firing, the horns and spikes were placed in their specific locations with ultra-strong glass glue.

Both pieces were mounted with a few inches of separation from the wall.